
How to Make Your Own Germination Station for Starting Seeds

This spring, one of my goals was to be able to start all of my plant seeds at home. I grow just about every kind of vegetable you can imagine, along with a ton of herbs.
In the past, I have both started my own seeds (for a few of my herbs along with a few types of tomatoes) but everything else was either direct-seeded or purchased as a seedling from another location.
This year, I wanted to be totally self-reliant.
So, being the overly (foolish) ambitious person I am, I spent more than $300 on seeds at Gurney’s (whoops) and excitedly awaited their arrival.
I had no qualms about starting all of my own seeds - I had grown several plants indoors from seed before and it wasn’t that difficult.
Until I realized that I had next to no space in which to do this.
Whoops again.
In the past, we started our few seeds on a folding table in my office. That’s all well and good, except it doesn’t provide a lot of space, and also, the seedlings tend to get leggy as they reach toward the window for sunlight.
I looked online at premade growing stands, and let me tell you - they were expensive. The only one that came close to being the size I needed was more than $700!
I recruited my husband for a brainstorming session, and this is what we came up with. Let me tell you, it’s the perfect solution.
Here’s how to make your own germination station so you can start as many seeds as you want indoors.
**J&R Pierce Family Farm is a participant in the Amazon Services LLC Associates Program, an affiliate advertising program designed to allow sites to earn advertising fees by linking to products on Amazon. I often link to Amazon when recommending certain products, and if you choose to purchase, I may earn a small percentage of the sale. It costs you nothing extra, and all recommended products are ones that I personally vouch for. **
Can You Start Any Seed Indoors?
Technically, yes - you can start seeds for any type of plant indoors. But that doesn’t mean you should. Some of the best plants to start from seed indoors are:
Tomatoes
Peppers
Eggplant
Broccoli
Cauliflower
Kale
Any long-season crop does fairly well when started from seed indoors, but there are some with more fragile roots (like melons and pumpkin) that still do better when directly sown outside (unless you start in peat pots). Most root crops prefer to be direct sown, too.
Here’s a video that will break things down even further for you:
Overall Cost
Sheet of CDX: $25
Box of screws: $10
Lumber: $36
Heat mat: $33
Total: $194
*Note - your costs may vary and there are ways to make this cheaper. For example, you aren’t going to use the whole box of screws and you could easily use scrap lumber if you can cut it to your desired dimensions. We used construction-grade lumber so it has some imperfections but works just fine for this application.*
Overall Time
Less than 3 hours construction time, not counting the actual seed starting and shopping for materials
Materials
Here's a shot of the basil up and running.
12 2x4x8 stud lumber
1 sheet of ½” CDX plywood
~1 lb 3” star-drive screws
1 heat mat
Assorted trays for seed starting
Tools Used
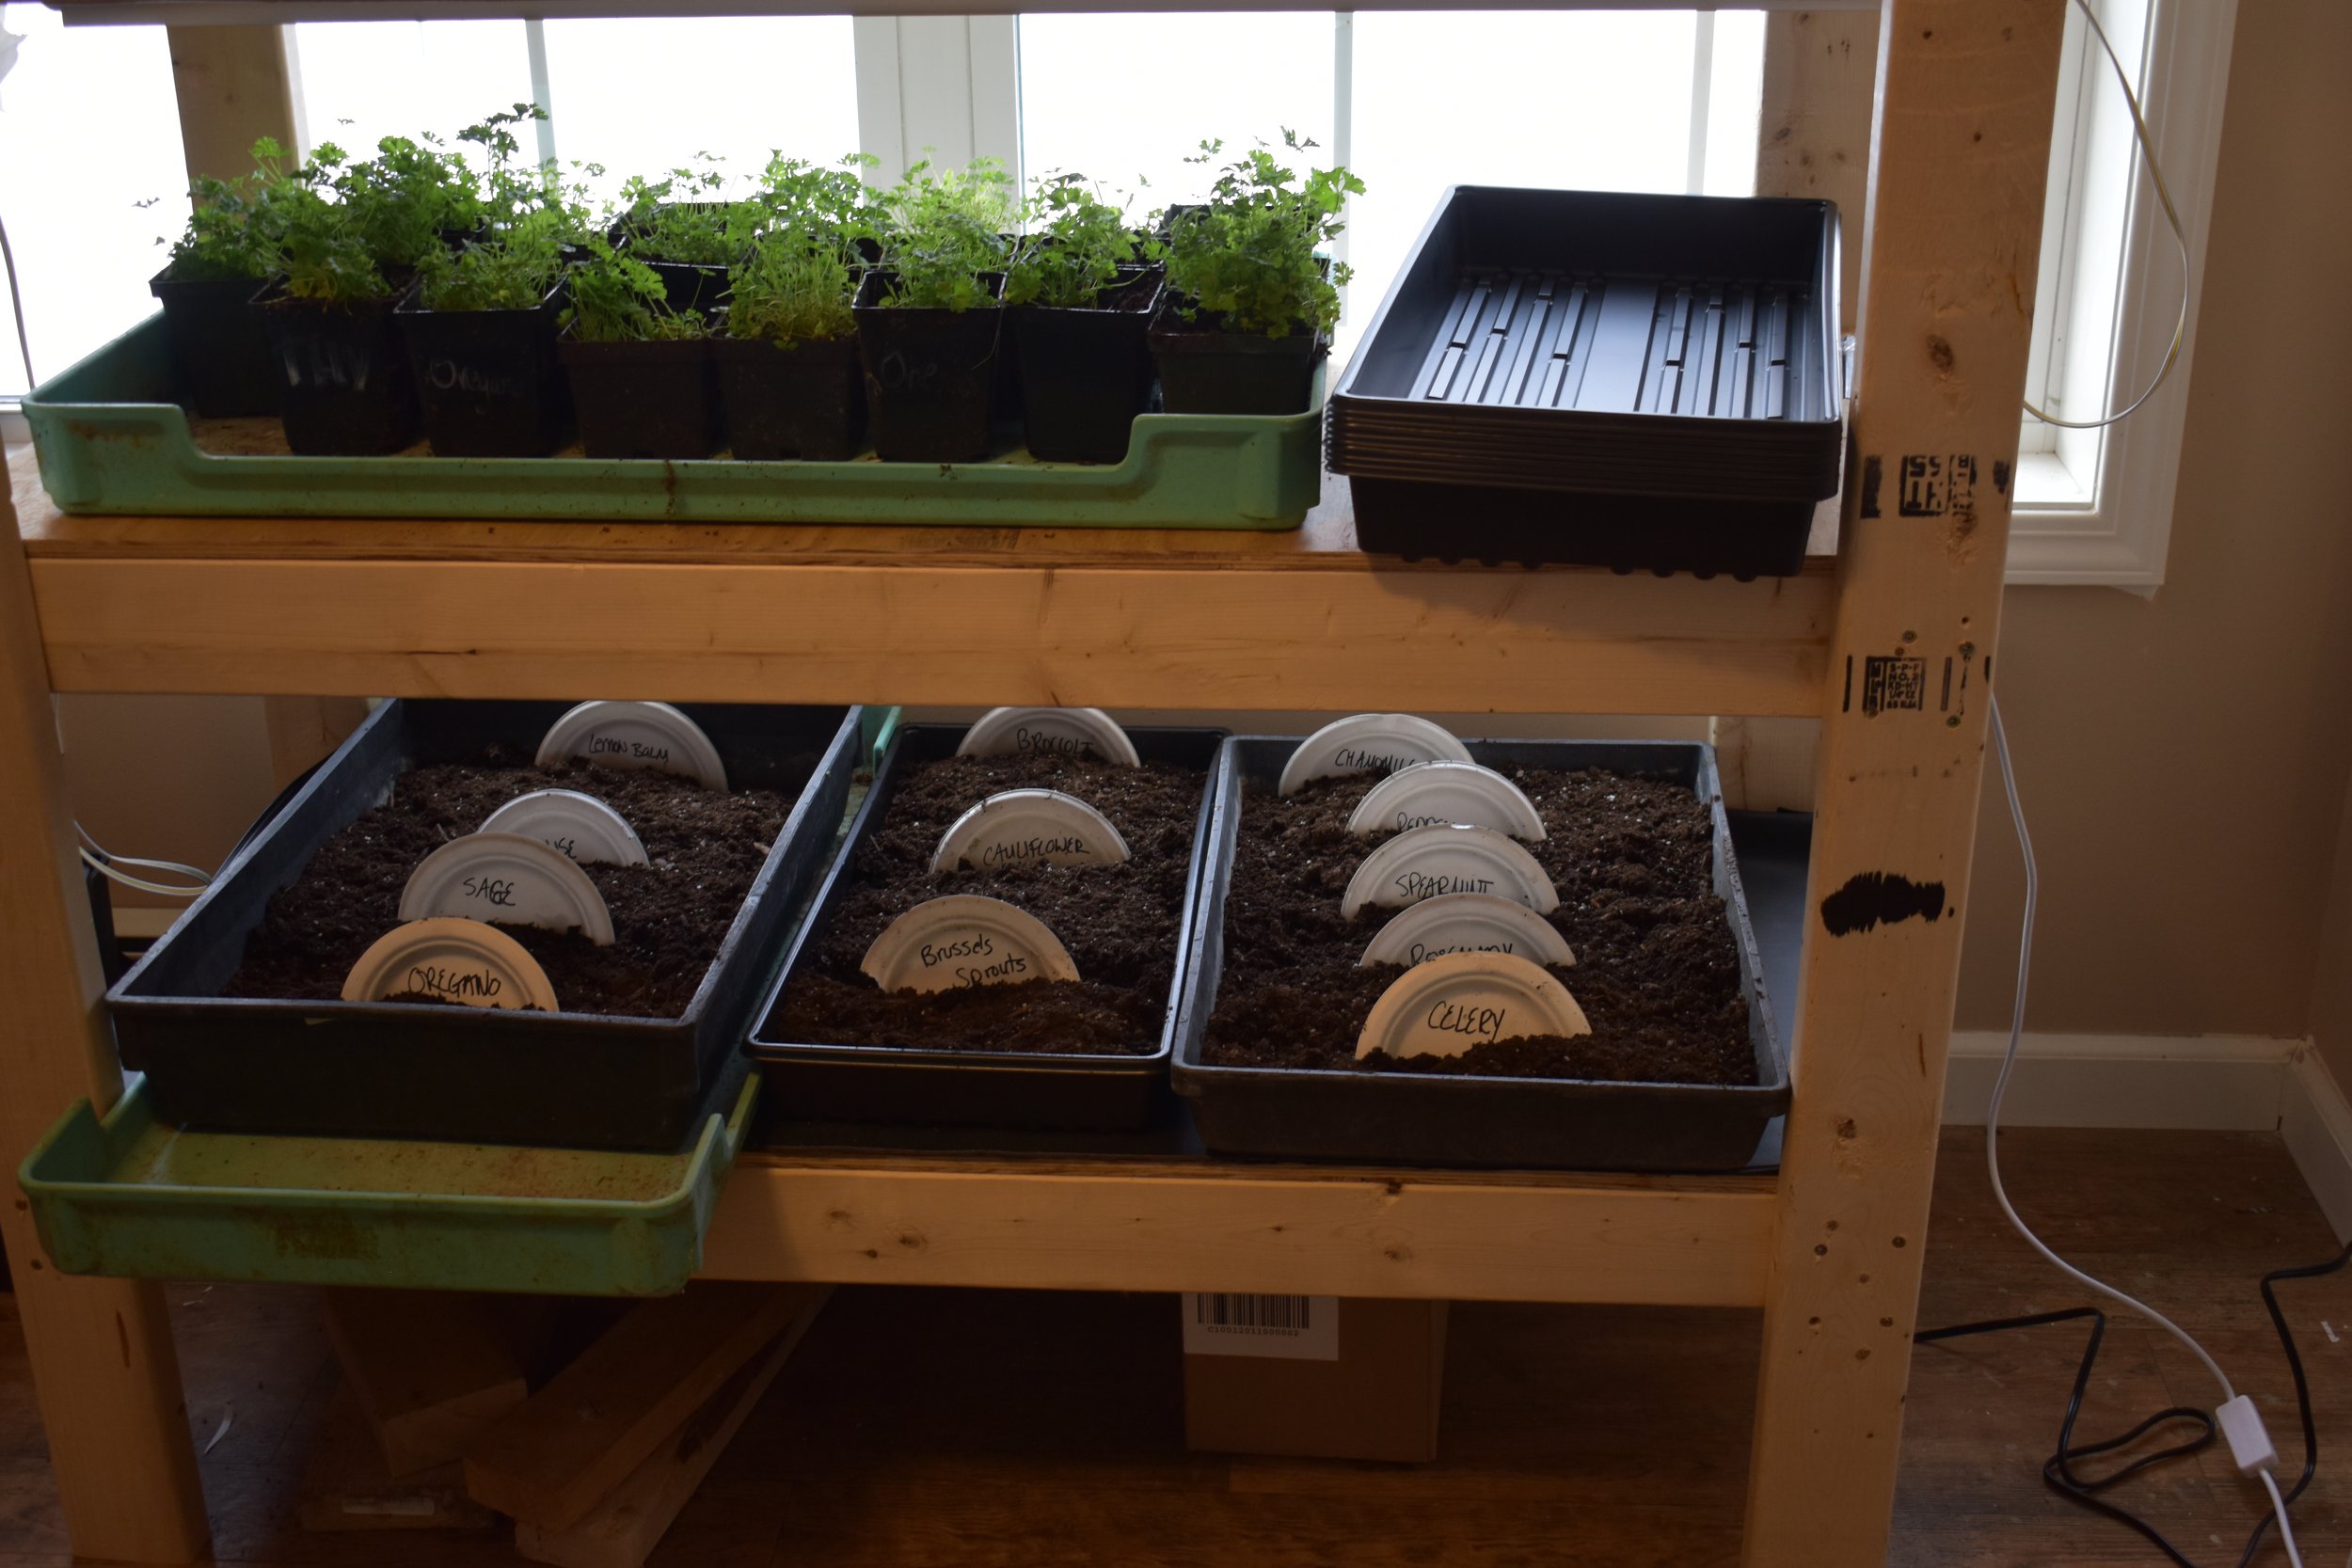
Here's a closer pic of the germination station in action. The bottom shelf is used exclusively for getting the seeds going, which is where the heat mat is located.
Drill or quarter-inch impact
Chopsaw (compound miter saw) (circular or handsaw would also work)
Speed square
Pencil
Dimensions
78” tall, 22” wide, 48” long
Building Notes
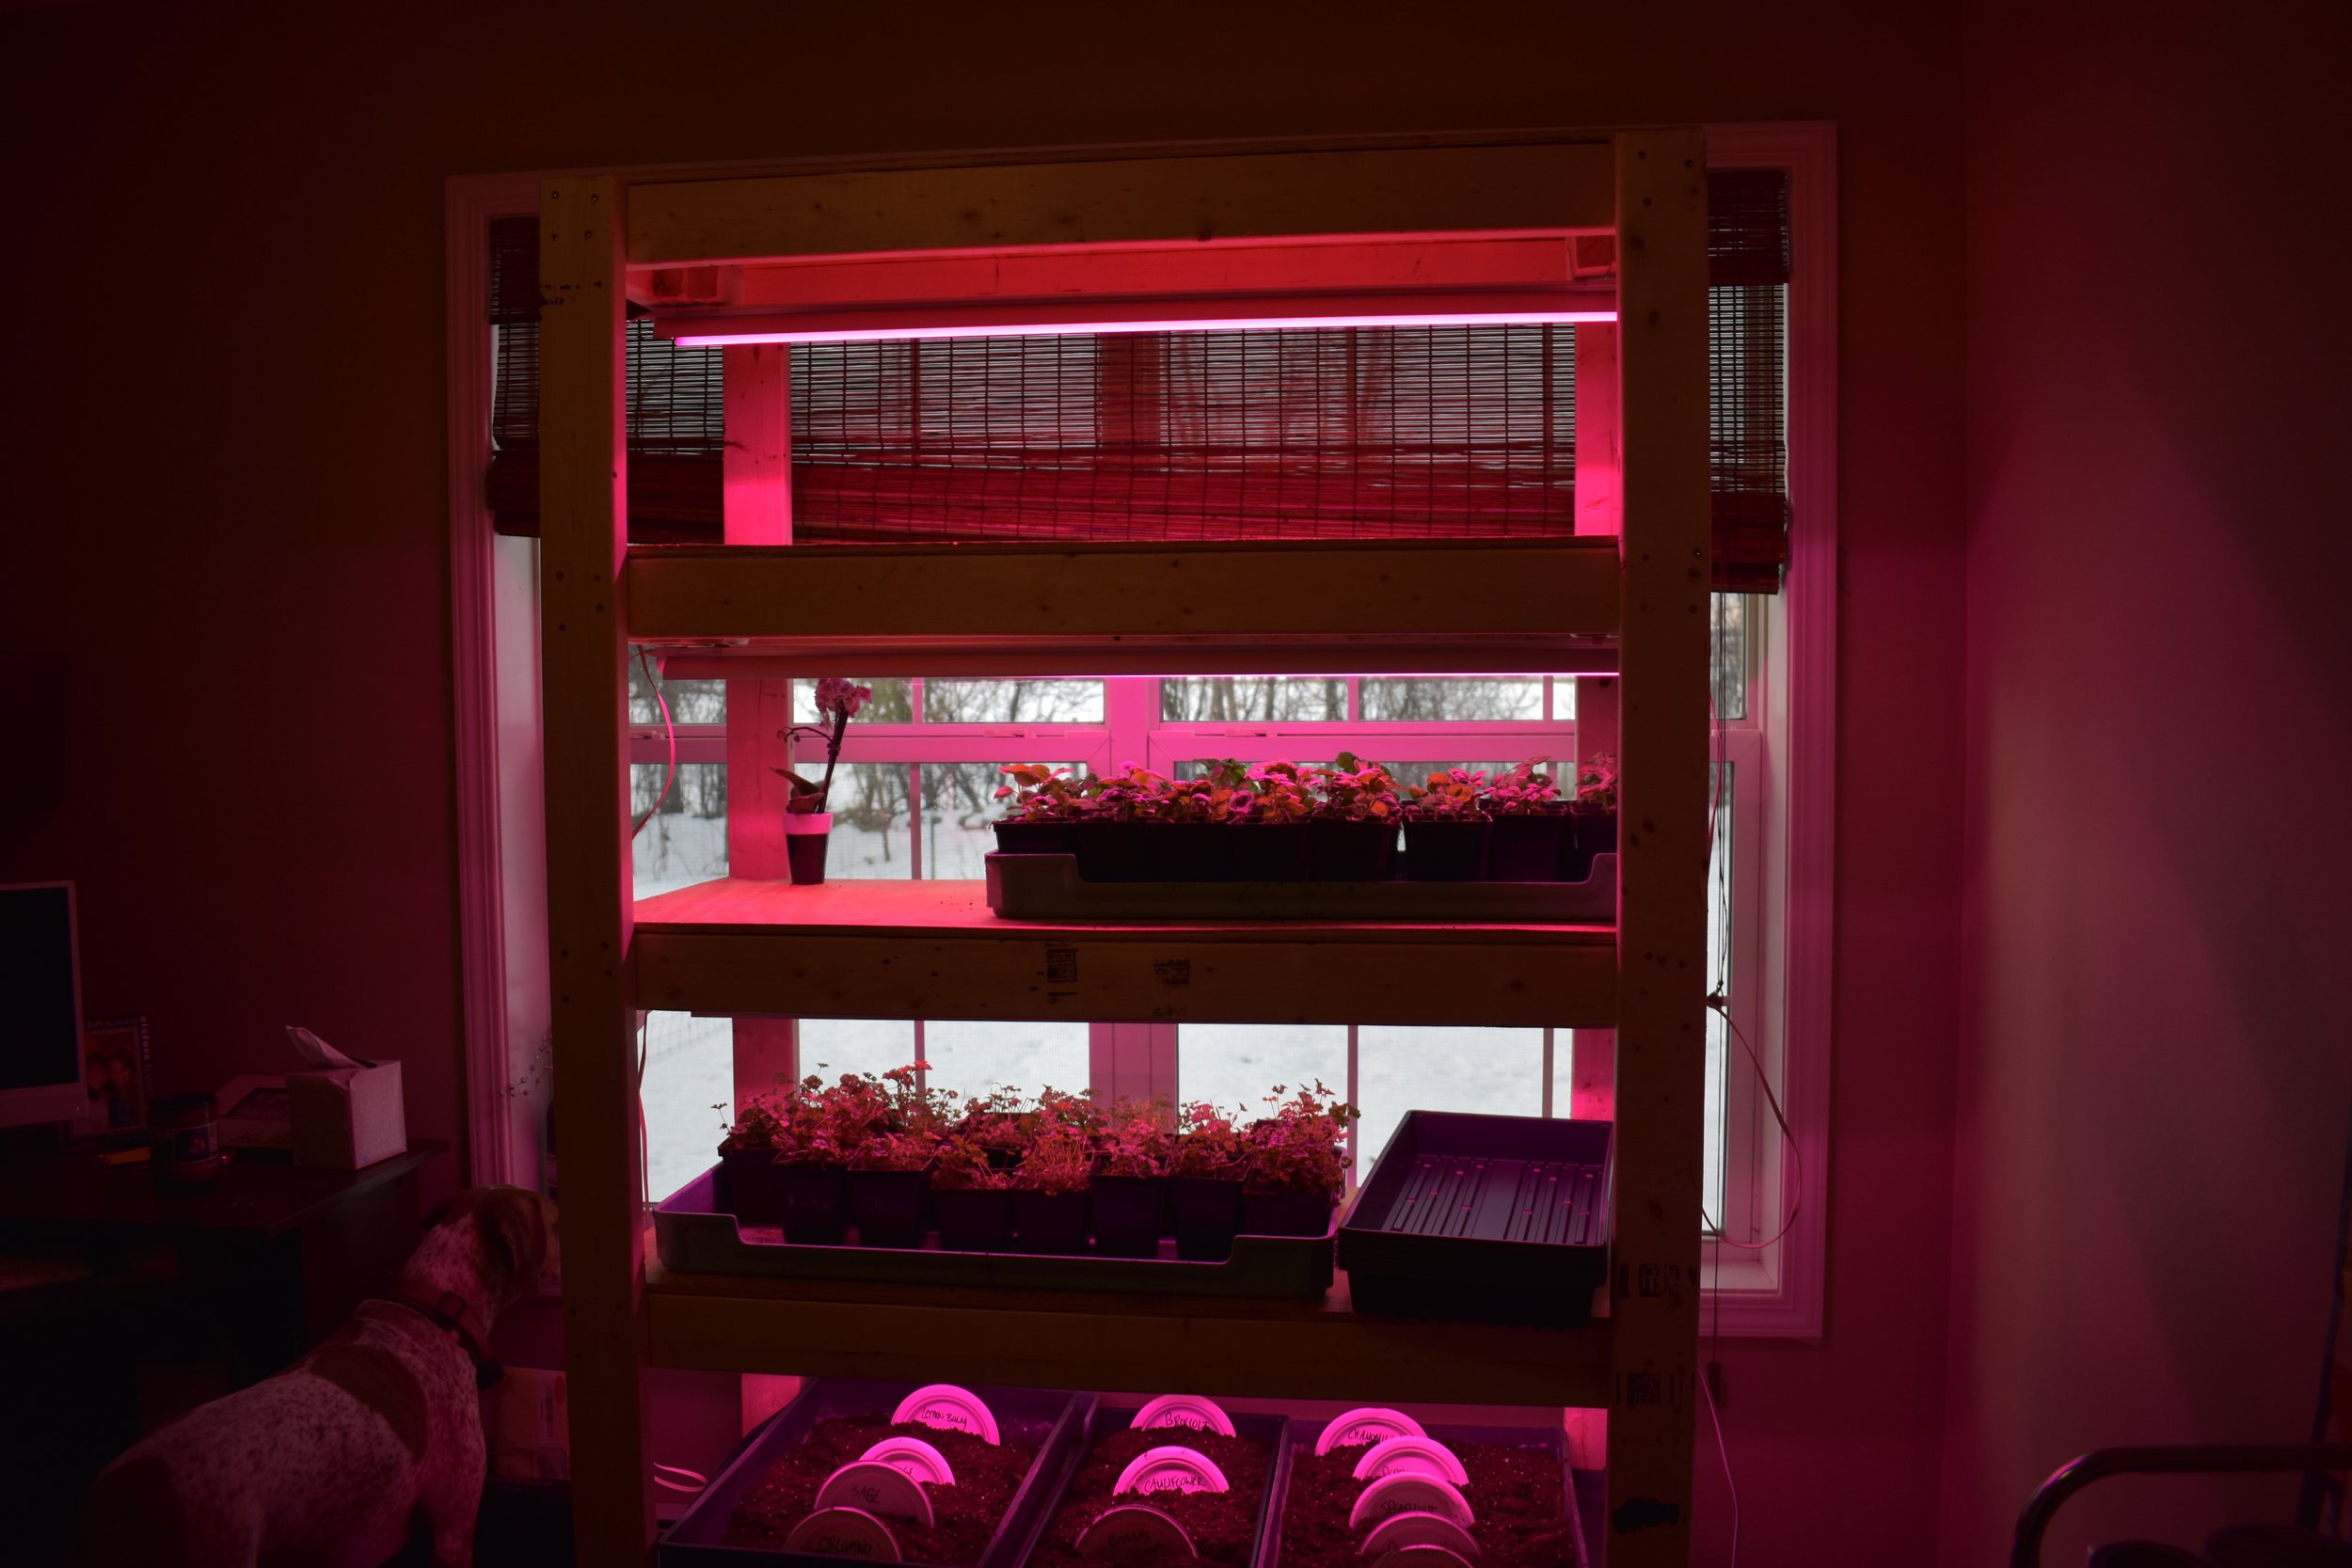
Pardon the poor lighting, but here's an image of the germination station up and running - don't mind the friendly farm dog in the corner!
Measuring & Dimensions
A couple tips. First, measure extensively before you begin, and don’t just measure your materials. Measure your heat mat, your grow lights, and your doorways. When finished, this station will be heavy, so you really don’t want to have to move it more than necessary.
Otherwise, you can make adjustments. We picked 78” just so it would fit through the door but would also provide us with the maximum amount of growing space. You could make it taller or shorter depending on your needs. For approximation purposes, a standard doorway has an opening of 84”x30” or 32”. Keep this in mind!
As for width, we picked 22”. This made it easier to get around corners.
When it comes to the 48” measurement, we made a bit of a mistake. Luckily, it was easily salvageable, but one I want to tell you about so you don’t do the same thing! We originally wanted our lights to mount to the plywood and not to the bottom of the 2x4, as you might be able to see in this picture. It doesn’t really change the structural integrity of the unit, but we lost about three and a half inches of growing space as a result.
I don’t think it will impact our seedlings much, since they’ll probably be outside by the time they get that tall. And you could actually mount your lights to the 2x4, too, if you want - you’ll just lose a little bit of space.
The lights I recommended come with mounting hardware. If you plan to mount to the plywood and want to use our measurements, you can - just cut your long shelf supports at 48” instead of 45”. Note that this will add three inches in width, though.
The Supplies
These LED grow lights are the best when it comes to starting seeds indoors.
I already gave you a list of supplies, but here are the specific ones I recommend.
For the grow lights - we picked a four-pack of four-foot LED lights by Barrina. There’s a link to it here. These are full-spectrum grow lights that are about as close to natural light as you can get. They are incredibly bright - don’t stay in the same room as them for too long - I found that when I left, I was seeing green!
They are super effective, though, at getting your plants to grow uniformly. The plug ends are interchangeable, meaning you can plug them in on any side (so you don’t have to worry about being too far away from an outlet).
They also don’t generate heat, which made me feel more comfortable leaving them on long-term.
Finally, these lights ccome with installation clips and double sided tape along with cable ties. You can use the clips or tape to mount them, like we did, you can tie them on to a grow light stand, or you can hang them from the ceiling. The choice is yours!
Like I said, we bought a four-pack, but Barrina also sells two- and six-packs, as well as lights in varying lengths in case the four foot length doesn’t work for you.
For the heat mat - I selected a waterproof seedling mat by Vivosun. You can find it here. Now, you can also purchase this in a variety of sizes (including 20x20, 3x20, 10x20, and the one I picked, 48x20). We wanted the largest one possible so that we could start the most seeds at one time. It keeps the seeds up to 20 degrees warmer than they would be just sitting on the shelf in your room.
It comes with its own power cord and since it’s waterproof, you don’t have to worry about getting water on it when you water your seedlings.
For the seed starting trays - You might notice in my pictures that I have trays of a few different sizes. The ones that I am recommending are the narrow ones linked to here, as they fit easily on the shelves and don’t take up quite as much space. They do not have drainage holes, which is fine for starting flats (I will transplant into larger containers once the seeds get up and running).
For all other supplies- We selected low-cost building supplies so that we wouldn’t have to spend more money than necessary on this germination station. Using construction-grade lumber can help, as can shopping around for the cheapest building materials you can find.
Instructions

You can see where the supports come together in this pic.
1. Decide on your desired dimensions. For our purposes, it made sense to have a station that was 78” tall, 22” wide, and 48” long. This allowed us room for four shelves (with a possible fifth shelf and storage underneath if necessary). However, it also needed to be able to fit inside our doorway.
2. Cut your main supports. Cut these from your 2x4s. You will need four main supports, each cut to 78”.
3. Measure and cut your wide shelf boards. These will run width-wise to support the shelves. You will need ten pieces, each cut at 45”.
4. Cut 10 additional boards at 19”. These are for your length-wise shelf support boards.
5. Lay out your shelves. Lay out your shelves at 16” (16” between each shelf). This can vary if you want taller or shorter shelves but remember that you will need room for your seedlings as they get taller. In other words, don’t just measure to the top of your seed-starting trays but add a few extra inches for insurance.
To measure your shelves, start with the top and measure down to the next. Screw the 19” wide pieces to each side of the uprights on both sides.
6. Screw the 45” long pieces together. These will butt up to make a square to form a shelf. At this point, you should now have a “frame” for your shelves.
7. Cut your plywood. Cut the CDX plywood to 48” long by 19” wide. This will form the base of your shelf. Screw it down to your squares.
8. Move it into position. Okay, now the hard part! This thing is going to be HEAVY. You will definitely need two people to move it. However, as long as everything is square when you cut and measure, it will also be very sturdy and unlikely to tip.
9. Hang your lights. Again, they can be mounted to the plywood or attached to the 2x4s, depending on which option you chose.
10. Roll out your heat mat. We found that our heat mat was furled up and didn’t want to lay down flat after it had been shipped to us. Therefore, we put some blocks of wood on it to level it out for a few days. If you’re planting right away, you won’t have to do this - your seed trays should hold it down.
11. Plant your seeds! And now the fun part...it’s time to plant your seeds.
Final Thoughts

Like my fancy plant labels? I ran out of my storebought ones so...paper plates it is!
We figure that with this shelf, we will be able to start all of our own plants indoors, plus potentially some that we can sell to other people. It’s absolutely massive (and since we positioned it by a window, it also looks from the road like we are growing something...well, something not so innocent!!) but I really think it’s going to do the trick this year. Add one of these to your garden planning chart this year!
Let me know in the comments if you try this out, and whether it works for you!
Want to learn more about farming? Be sure to check out these featured articles!
Subscribe to our email newsletter for regular tips and tricks on homesteading – wherever you are. You can also follow us on Instagram (@jrpiercefamilyfarm) and Pinterest (J&R Pierce Family Farm) for frequent updates. Happy homesteading!